It is my sincere belief that every man, woman, and child need to have at least one can of chalkboard paint.
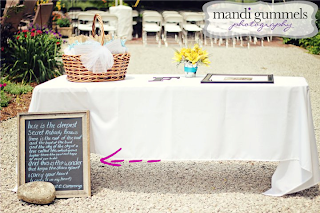
I bought my first can to turn this cheap frame from Hobby Lobby into this for our wedding:
Well, I was feeling rather inspired after I started to set up a schedule with the kids. I knew that we had to really start hitting the alphabet, I just didn't know how to do it.
And then I remembered this:
My boss/neighbor gave me this mirror one day as I was leaving. Her friend had given it to her, but she didn't know what she'd use if for. I told her I didn't need it, but I was in a rush that day, and she insisted. I left it in my basement to start collecting dust.
I decided to try the chalkboard paint out on it. So while the kids slept, I quickly threw scotch tape around the white part and did the first coat:
Throughout the day, I added on to it two to three more times (by the fourth coat, I was good). By the night, it looked like this:
I took some sand paper and sanded away a bit at the frame to take down the glossiness. Then I mixed together some cheap acrylic paint and painted around three coats.

So this morning, it looked like this:
Then I measured it out. I made a mark three inches from the top and then three from the bottom. In the middle of the two marks, I made another. Then I used a straight-edge (yes, that is the Sims, and it was mighty handy!) to bring the lines all the way across. I made sure to only use dashes for the middle line.
Then I used awesome concentration to go over the lines with white acrylic.
Ta-da!
Gabe and I reviewed the letter "A," and then I surprised him with this. He still doesn't quite get the concept of the lines, but he still had fun!
And so did Liam!
And once the lesson was done, they realized it made a great track for Thomas!
It was such a fun switch-up from our regular routine, and it made practicing the letters so much more fun!
I swear, chalkboard paint needs a trophy or something.


